Are you ready to elevate your Roblox clothing designs beyond basic shirts and pants? This comprehensive guide dives deep into advanced Roblox clothing templates, offering creators the insights needed to craft truly unique and appealing apparel. Discover techniques like precise texture mapping, creating layered clothing elements, and optimizing for various avatar body types. We'll explore trending design practices and essential tools that top Roblox developers utilize to make their virtual fashion stand out. Understanding advanced templates is crucial for anyone aiming to monetize their creations or simply express their creativity with greater fidelity. This resource helps you navigate the complexities of Roblox's design studio, ensuring your garments capture attention and resonate with the expansive player community. Learn how to transform your design ideas into sought-after virtual attire today, enhancing both visual appeal and creator workflow effectiveness.
Most Asked Questions about Advanced Roblox Clothing Templates
Are you diving into the exciting world of Roblox clothing design and feeling a bit overwhelmed by how professional some creators' outfits look? You're not alone! This is the ultimate living FAQ, meticulously updated for the latest patches and design capabilities in Roblox. We'll cut through the confusion, offering clear, actionable answers to help you master advanced clothing templates and elevate your virtual wardrobe. Whether you're a budding designer or looking to refine your craft, consider this your essential guide to unlocking next-level creativity. We're here to help you turn your design dreams into stunning in-game realities, ensuring your creations stand out.
Understanding advanced Roblox clothing templates means grasping the nuances of digital fashion. It involves more than just slapping a texture onto a basic shirt; it's about meticulous detail, strategic layering, and optimizing for the various avatar body types that populate the platform. Many players wonder how to achieve that polished, realistic look they see in popular games. This FAQ will tackle those very questions, providing practical tips, tricks, and guides that address common pain points and unlock new creative avenues. Get ready to transform your approach to Roblox clothing design.
Beginner Questions
How do advanced Roblox clothing templates improve my designs?
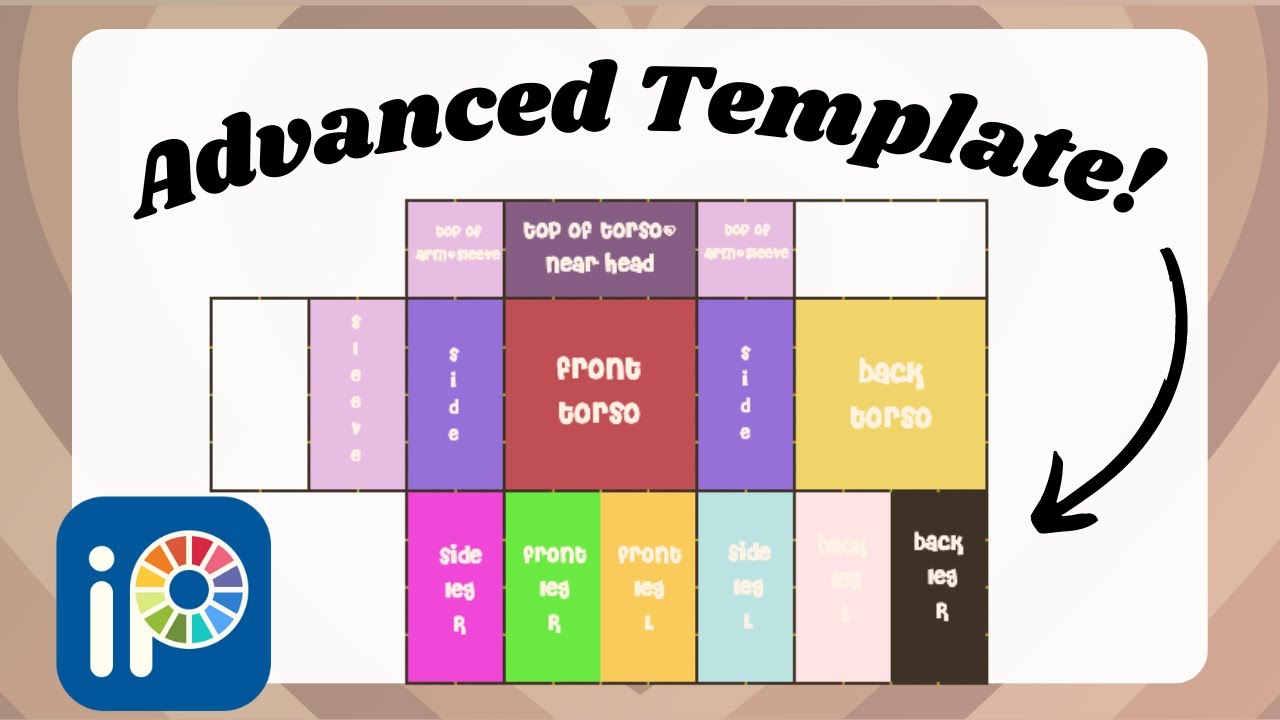
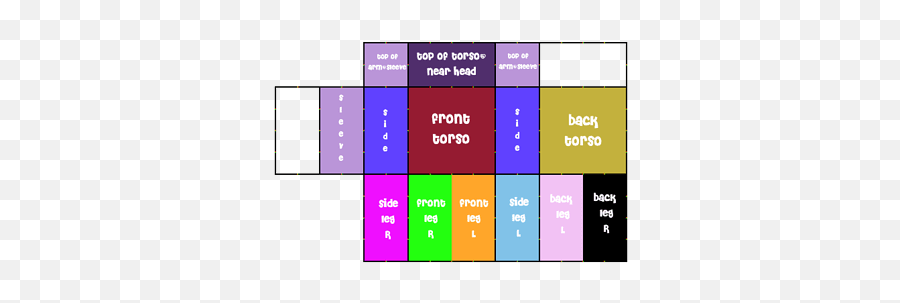
Advanced templates provide more detailed guides for precise texture placement, helping you align graphics and create realistic shadows and folds. They show specific areas for elements like cuffs, collars, and seams, which allows for a much more polished and professional final product. Utilizing these templates ensures your designs fit the avatar seamlessly without stretching or distortion, making them look high-quality and appealing.
What's the best software for editing Roblox clothing templates?
For editing advanced Roblox clothing templates, professional image editing software like Adobe Photoshop or Affinity Photo are highly recommended due to their advanced layering and brush tools. For free alternatives, GIMP and Krita offer robust features that can achieve excellent results. These programs allow for precise pixel-level control, crucial for detailed designs and proper texture mapping.
Can I use advanced templates if I'm new to Roblox design?
Absolutely! While they might seem daunting at first, advanced templates are incredibly beneficial for new designers aiming for a higher quality standard from the get-go. Many tutorials guide beginners through the process, breaking down complex techniques into manageable steps. Starting with advanced templates instills good design habits and helps you quickly grasp professional-level concepts for better outcomes.
Where can I find reliable advanced Roblox clothing templates?
The most reliable advanced Roblox clothing templates can often be found on the official Roblox Developer Hub or within community forums dedicated to design. Many experienced creators also share their custom templates or link to popular, high-quality base templates. Always ensure your source is reputable to avoid outdated or incorrect templates that could hinder your design process.
Tips & Tricks
How do I make my Roblox clothing designs look more realistic?
To make your designs realistic, focus on adding subtle shadows and highlights to simulate depth and texture. Use soft brushes and varying opacities in your editing software to mimic fabric folds and creases. Consider the material of your clothing—denim will have a different texture and sheen than silk. Observing real-world clothing helps inform these details, making your virtual garments more believable.
What are some tricks for designing Roblox layered clothing?
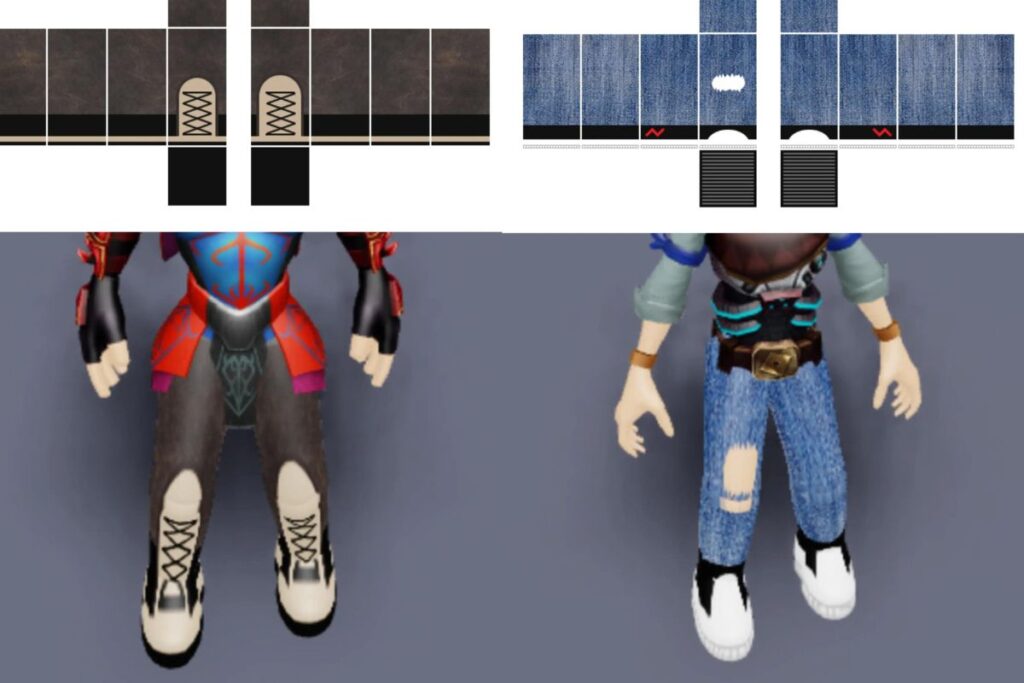
Designing for Roblox layered clothing involves thinking in 3D. Ensure your base template has proper transparent areas to allow layers underneath to show through. Focus on consistent scaling and placement for different clothing parts to prevent clipping. Experiment with multiple layers to create complex outfits, like a vest over a shirt, ensuring each element complements the others for a cohesive look.
How can I optimize my clothing textures for better performance?
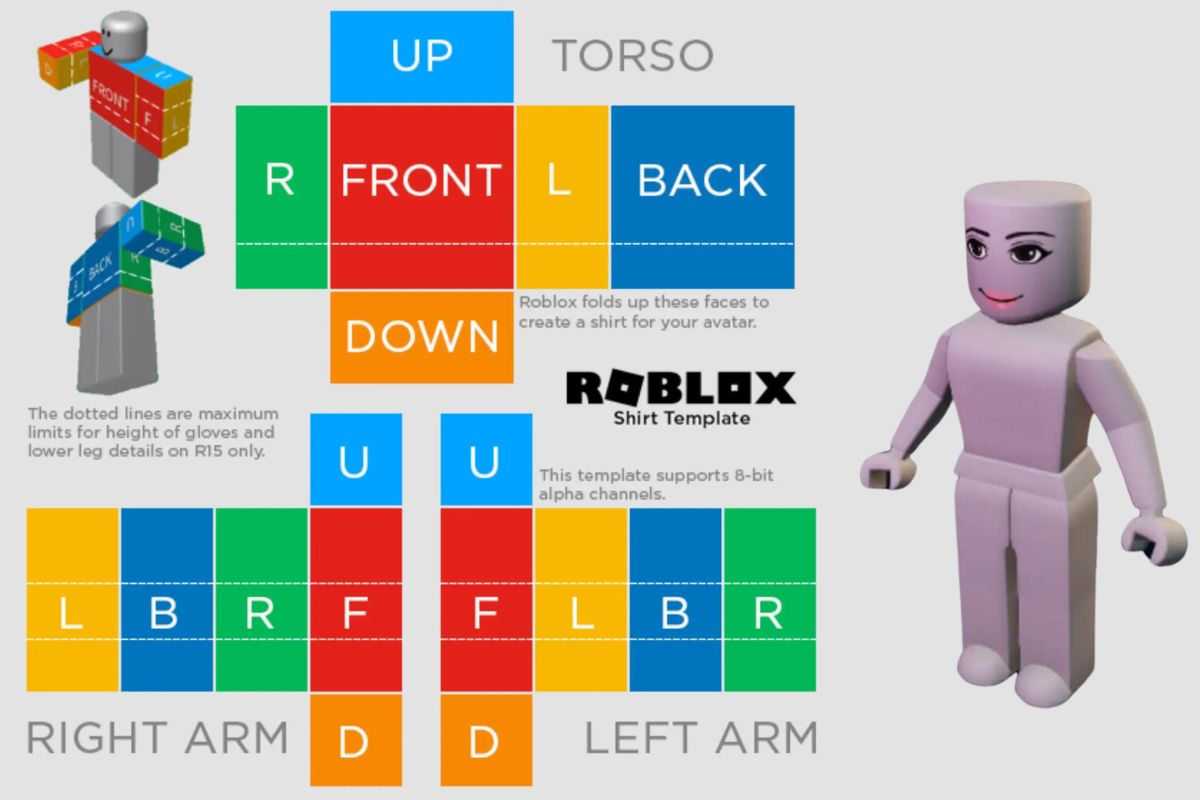
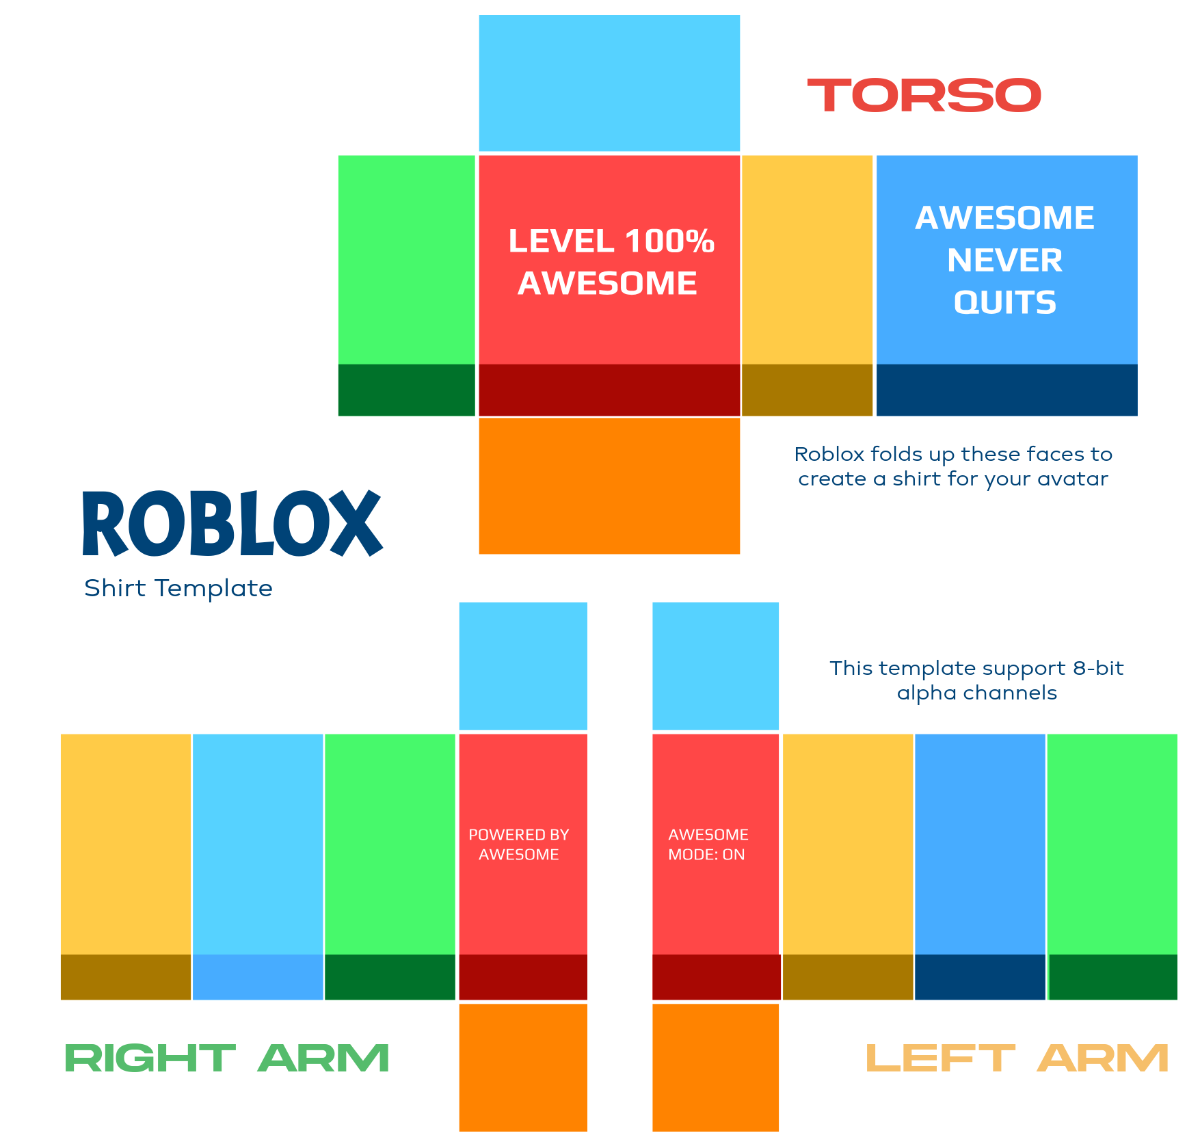
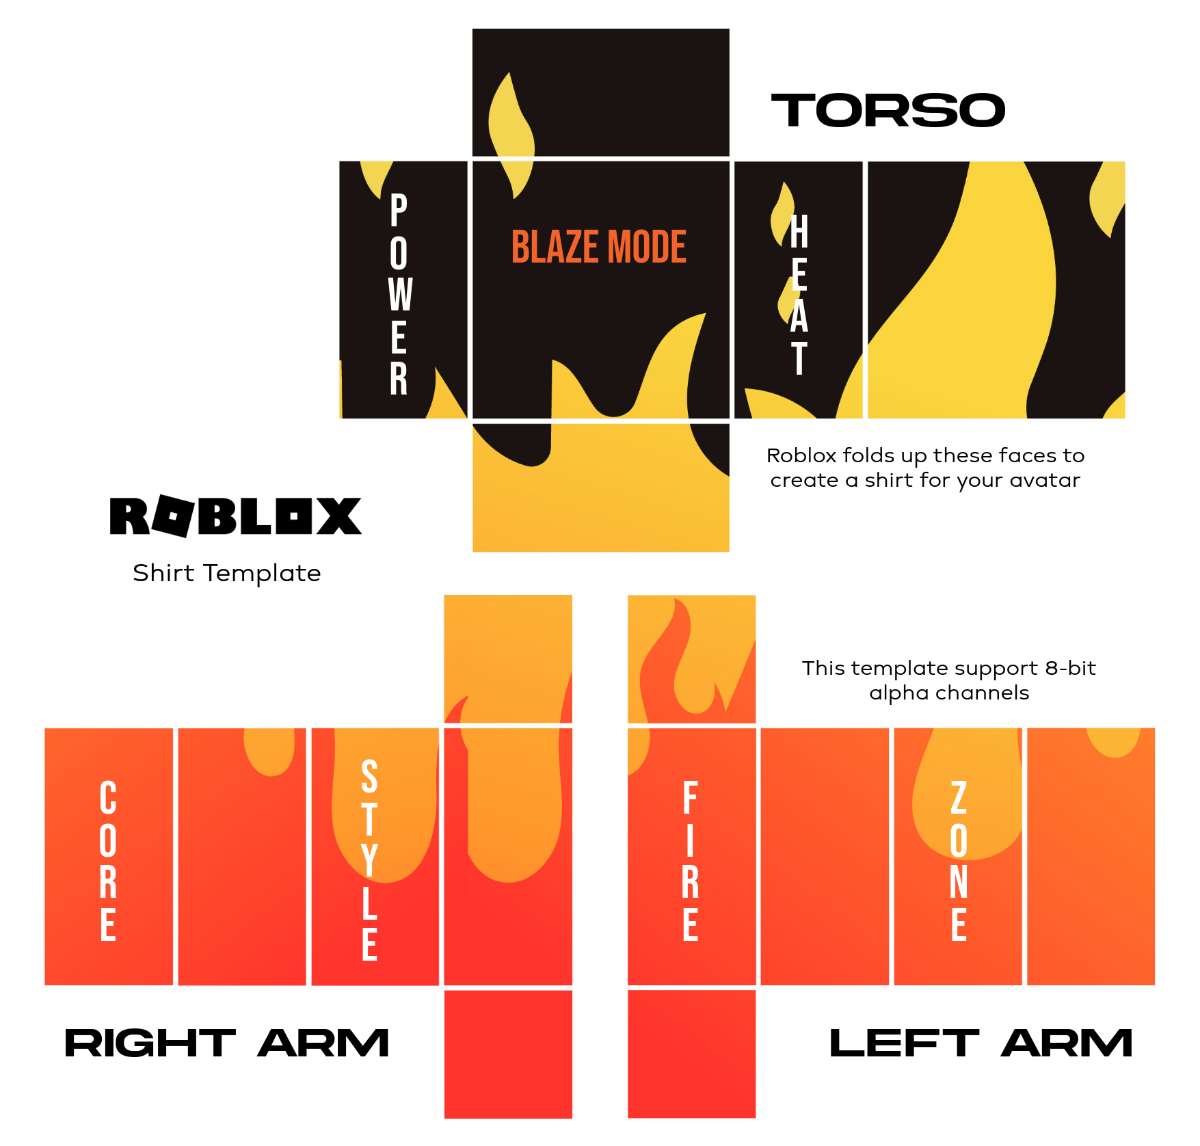
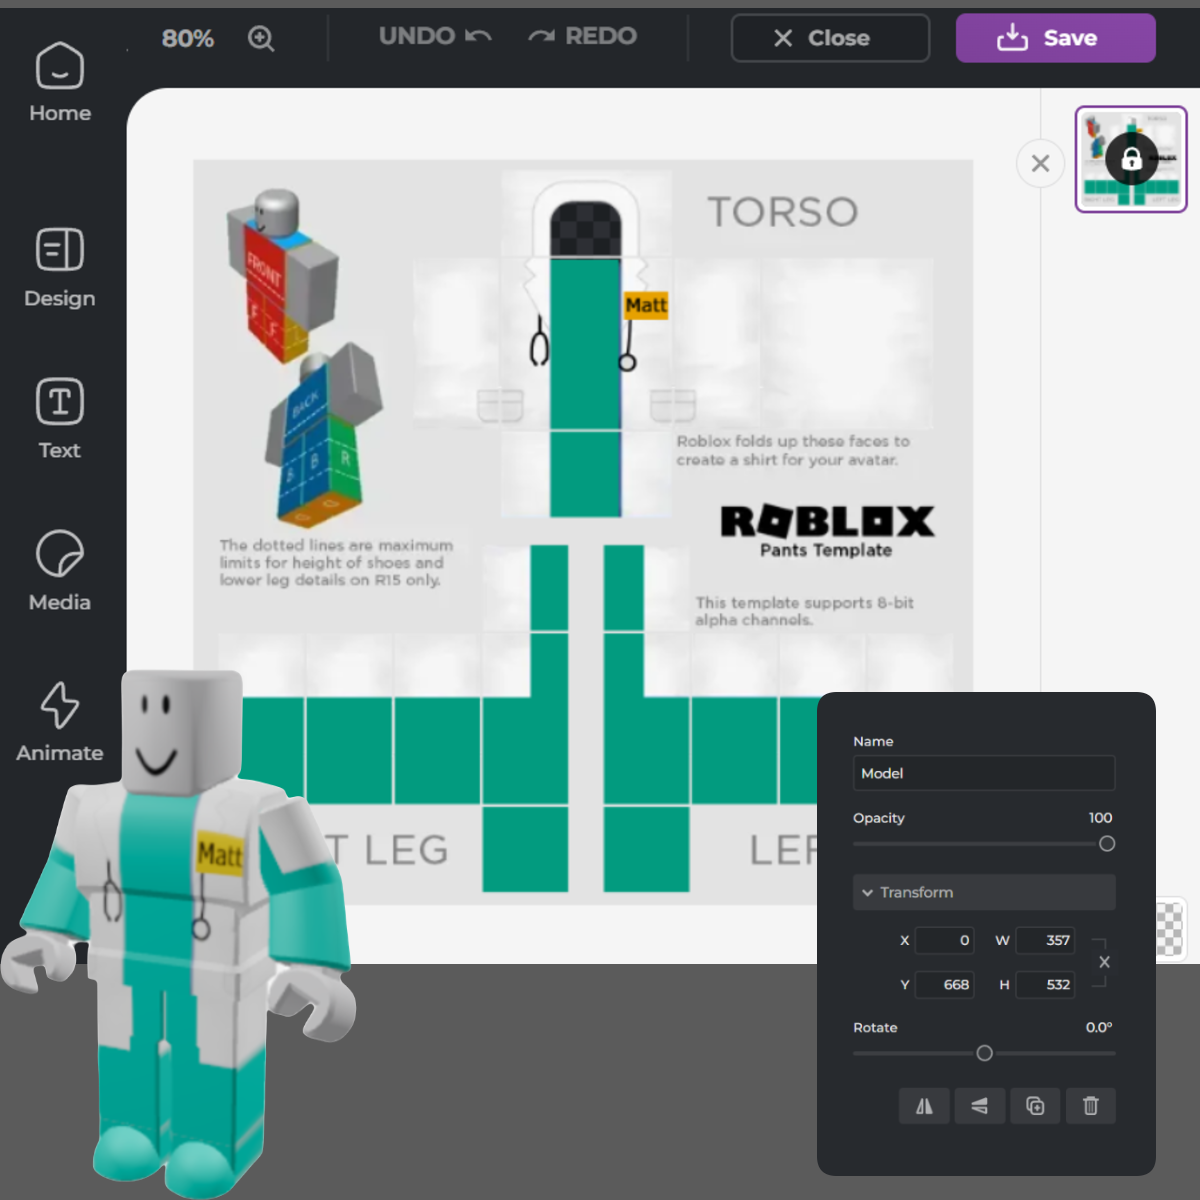
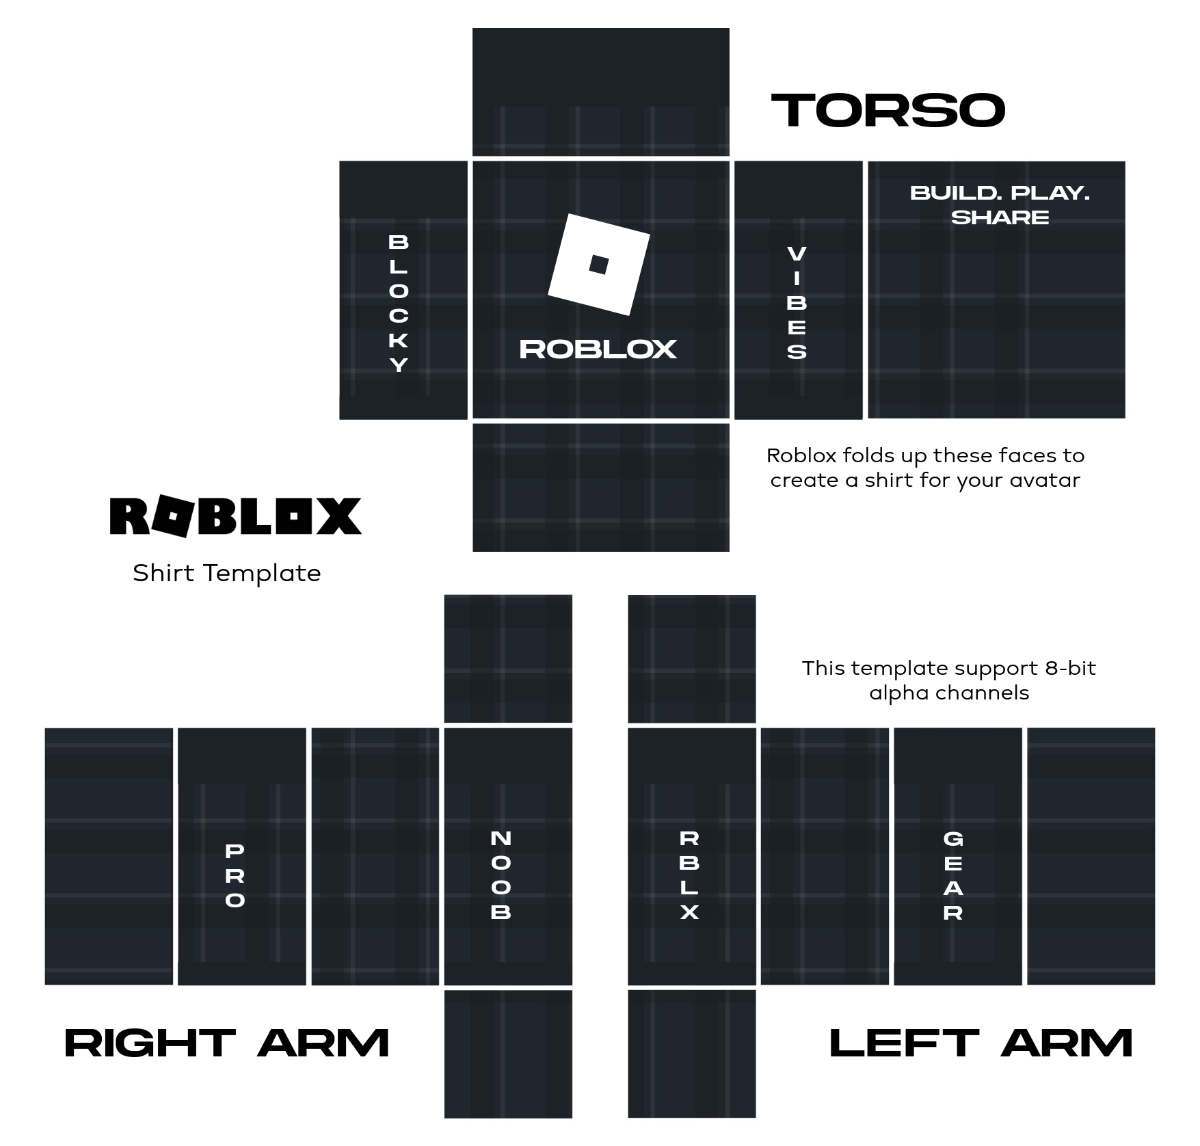
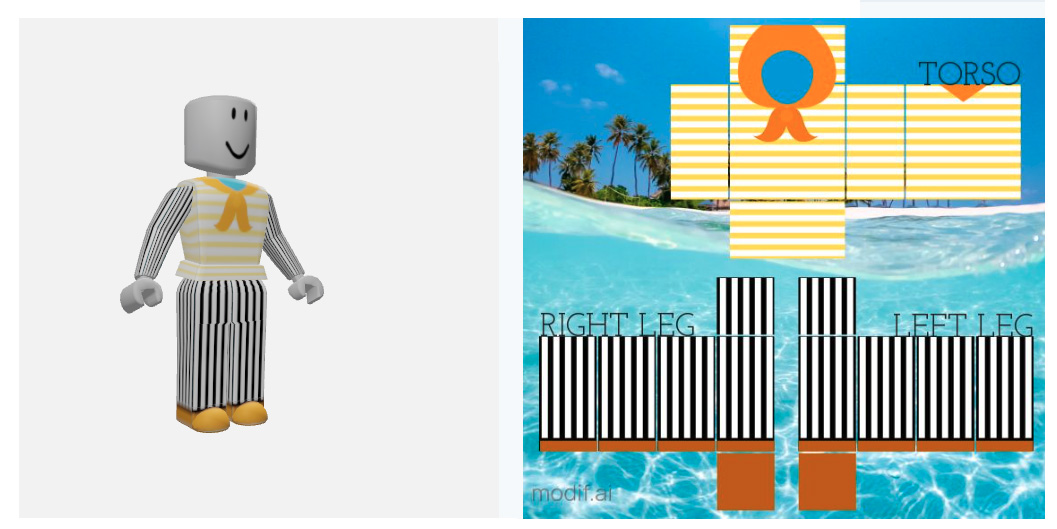
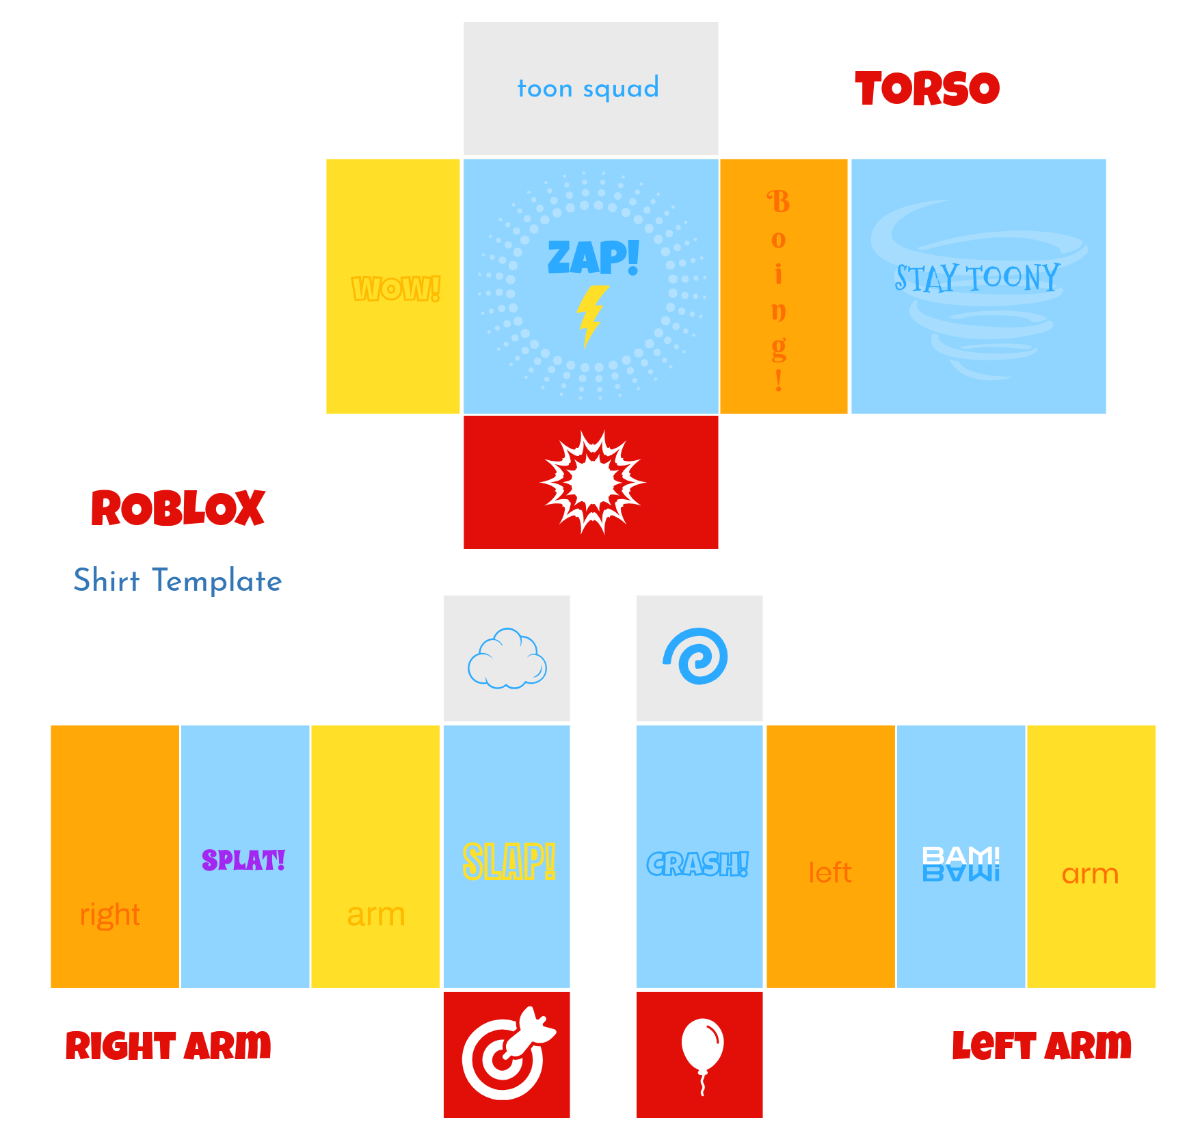
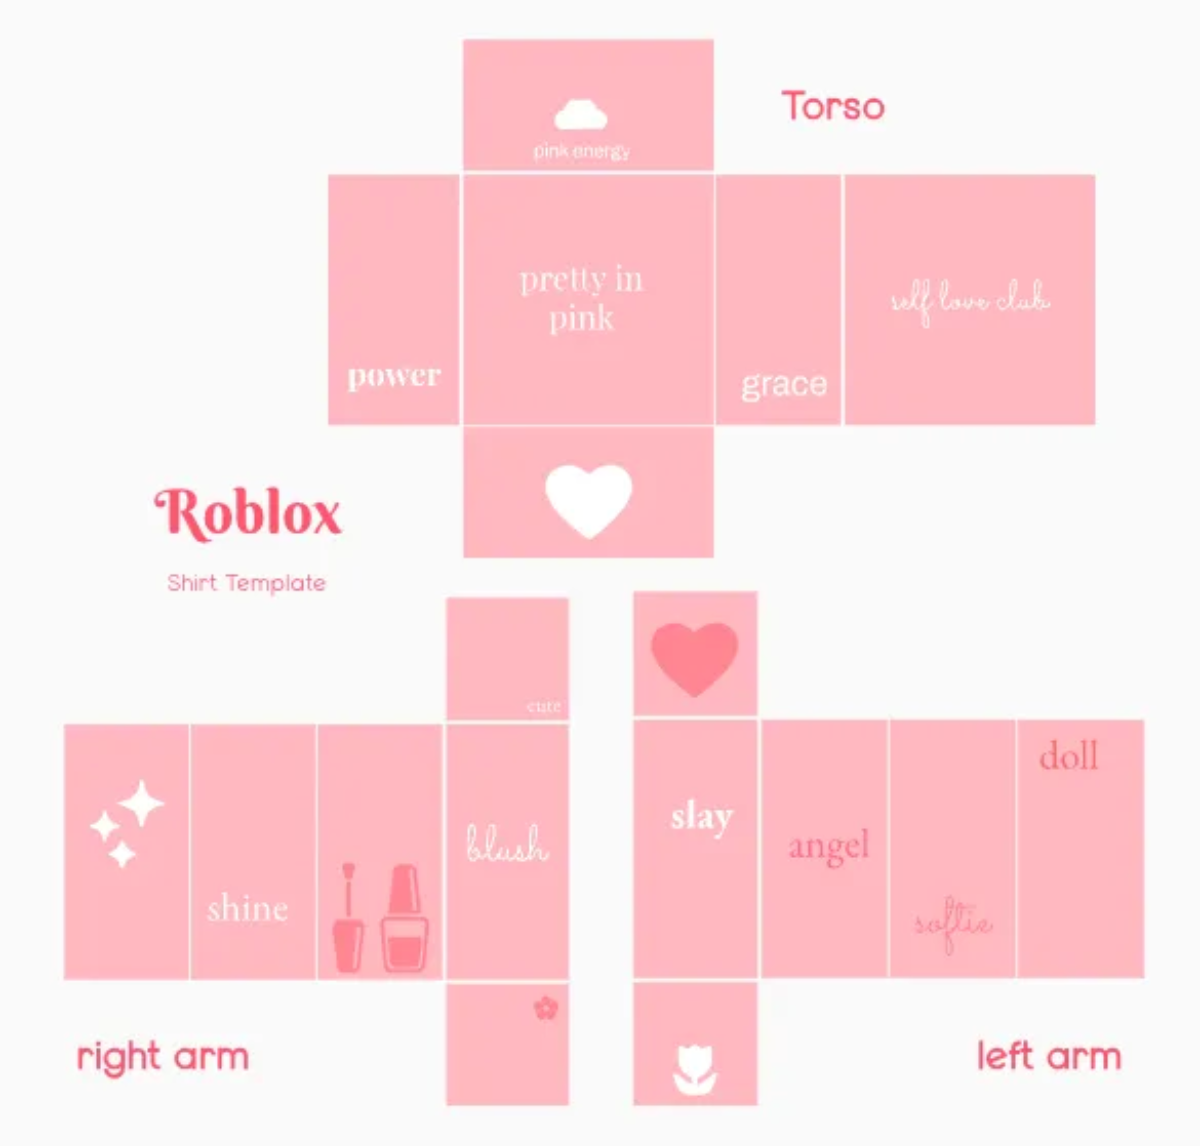
Optimizing textures involves keeping file sizes manageable without sacrificing quality. Use the recommended 585x559 pixel resolution for shirts and pants. Ensure your PNG files have minimal unnecessary transparent areas, and save them with proper compression settings. Avoid overly complex patterns that might cause lag on lower-end devices; simpler, high-quality textures generally perform better and load faster.
Endgame Grind
How do I monetize my advanced Roblox clothing designs effectively?
Monetizing advanced designs involves consistent quality and strategic marketing. Upload high-quality, appealing designs regularly to maintain player interest. Promote your creations in popular Roblox games, on social media, and within creator communities. Offer variety in your store, including different styles and colorways. Engaging with your audience and responding to feedback can also drive sales and build a loyal customer base.
What are the benefits of becoming a top Roblox clothing designer?
Becoming a top Roblox clothing designer opens doors to significant Robux earnings, recognition within the vast Roblox community, and potential collaborations with other creators or game developers. It establishes you as an authority in virtual fashion, allowing you to influence trends and build a substantial portfolio. The creative freedom and direct impact on millions of players' experiences are incredibly rewarding aspects of reaching this level.
Bugs & Fixes
My clothing design looks stretched or distorted on some avatars; how can I fix this?
Stretching or distortion usually indicates an issue with how your design aligns with the avatar's UV map. Double-check that you're using the correct template dimensions (585x559 pixels) and that your artwork is not disproportionately stretched within your image editor. Previewing your design on various avatar body types in Roblox Studio can help identify specific problem areas, allowing you to make targeted adjustments for a better fit across different shapes.
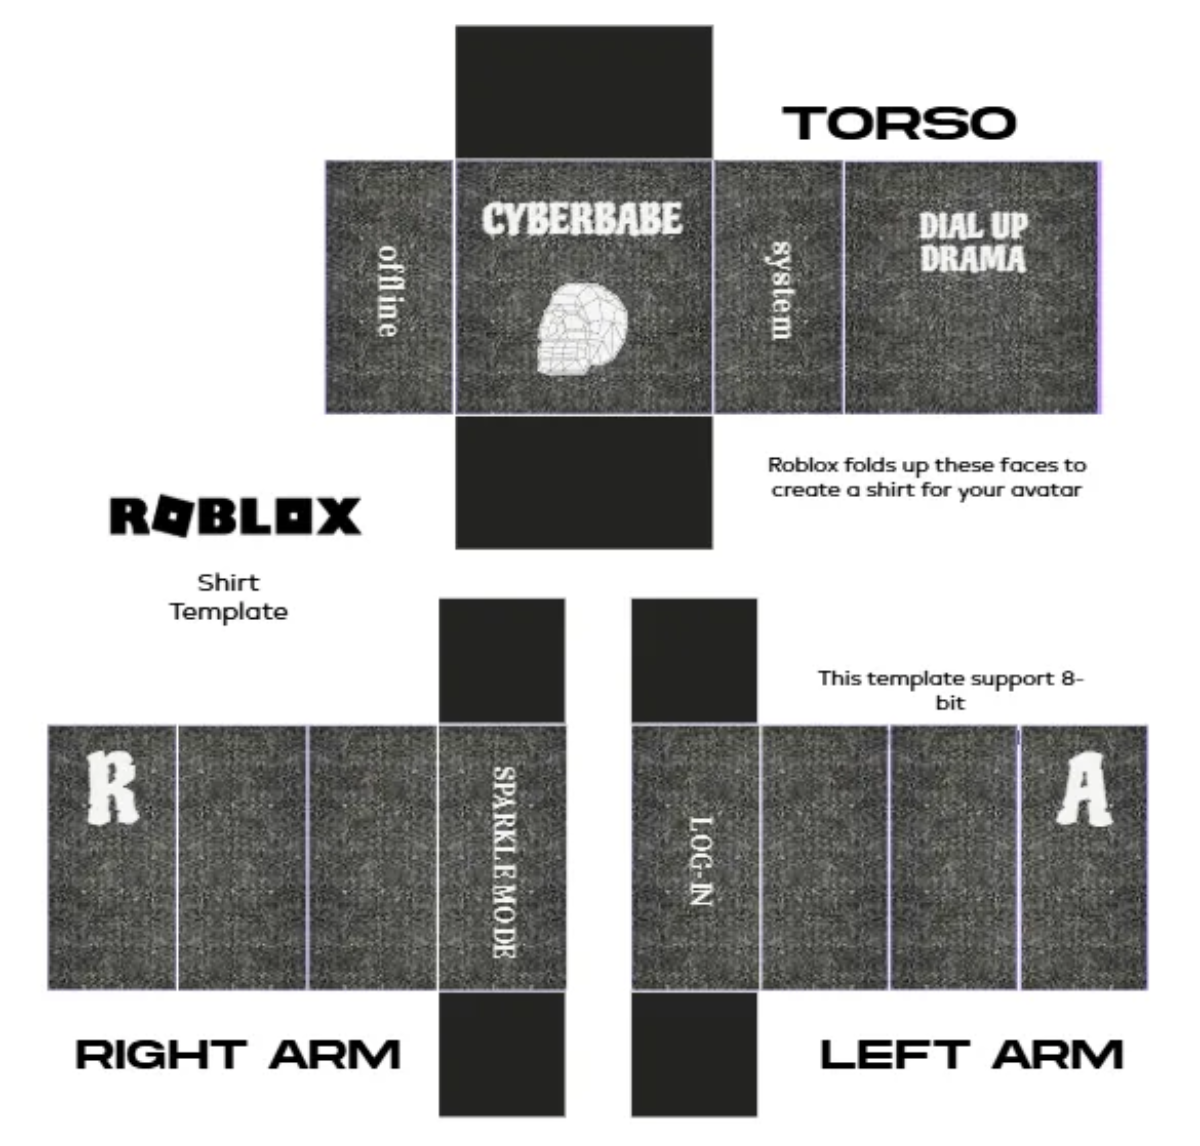
Why isn't my clothing appearing transparent in Roblox, even though I saved it as a PNG?
If your clothing isn't showing transparency, ensure that when you saved your PNG file, you explicitly enabled the 'Alpha Channel' or 'Transparency' option in your image editing software. Sometimes, even with a PNG, if the alpha channel isn't correctly preserved, Roblox will treat fully transparent areas as opaque white. Also, confirm there isn't an underlying opaque layer in your design file accidentally covering your transparent regions before saving.
Still have questions? Check out our most popular related guides on Roblox UGC creation and advanced avatar customization!
Ever wondered how some Roblox creators consistently churn out designs that look incredibly professional and stand out from the crowd? It's a question many aspiring designers ask when they first dip their toes into Roblox's vast creative ocean. The secret often lies in understanding and effectively utilizing advanced Roblox clothing templates. This isn't just about drawing pretty pictures anymore; it involves a deeper grasp of digital art, avatar mechanics, and community trends.
Why are advanced templates important for Roblox creators today? These sophisticated templates allow designers to achieve unparalleled detail and realism in their virtual garments. They move beyond simple flat textures, embracing complex shapes and layered elements that truly bring characters to life. Mastering these templates is essential for anyone serious about making a mark in the competitive Roblox marketplace.
Is there a strong demand for custom Roblox clothing that pushes creative boundaries? Absolutely, the Roblox community constantly craves fresh, high-quality, and unique attire. Players are eager to personalize their avatars with custom creations that reflect their style or the latest fashion trends. This demand fuels a vibrant economy for skilled designers who can leverage advanced templates effectively.
Where can aspiring designers find advanced Roblox clothing templates or resources to learn more? Many resources exist, from official Roblox documentation and developer forums to community-driven tutorials on platforms like YouTube. Understanding **Roblox clothing design techniques** is paramount, as it unlocks the full potential of these templates. Creators often share their insights, helping others grasp intricate concepts like proper UV mapping and pixel-perfect detailing.
When should a creator consider moving from basic design to incorporating advanced Roblox templates? Generally, once you've grasped the fundamentals of texturing and uploading, it's the perfect time to explore. This transition helps you differentiate your work and tackle more ambitious projects. Focusing on **Roblox template customization** allows for greater artistic expression and ensures your designs look unique.
Who benefits most from diving into advanced Roblox clothing templates and design principles? Both hobbyists looking to enhance their personal avatar and professional creators aiming to build a successful UGC business will find immense value. Implementing **UGC creation Roblox** best practices with advanced templates can significantly boost visibility and sales. It's about empowering your creative vision with the right tools.
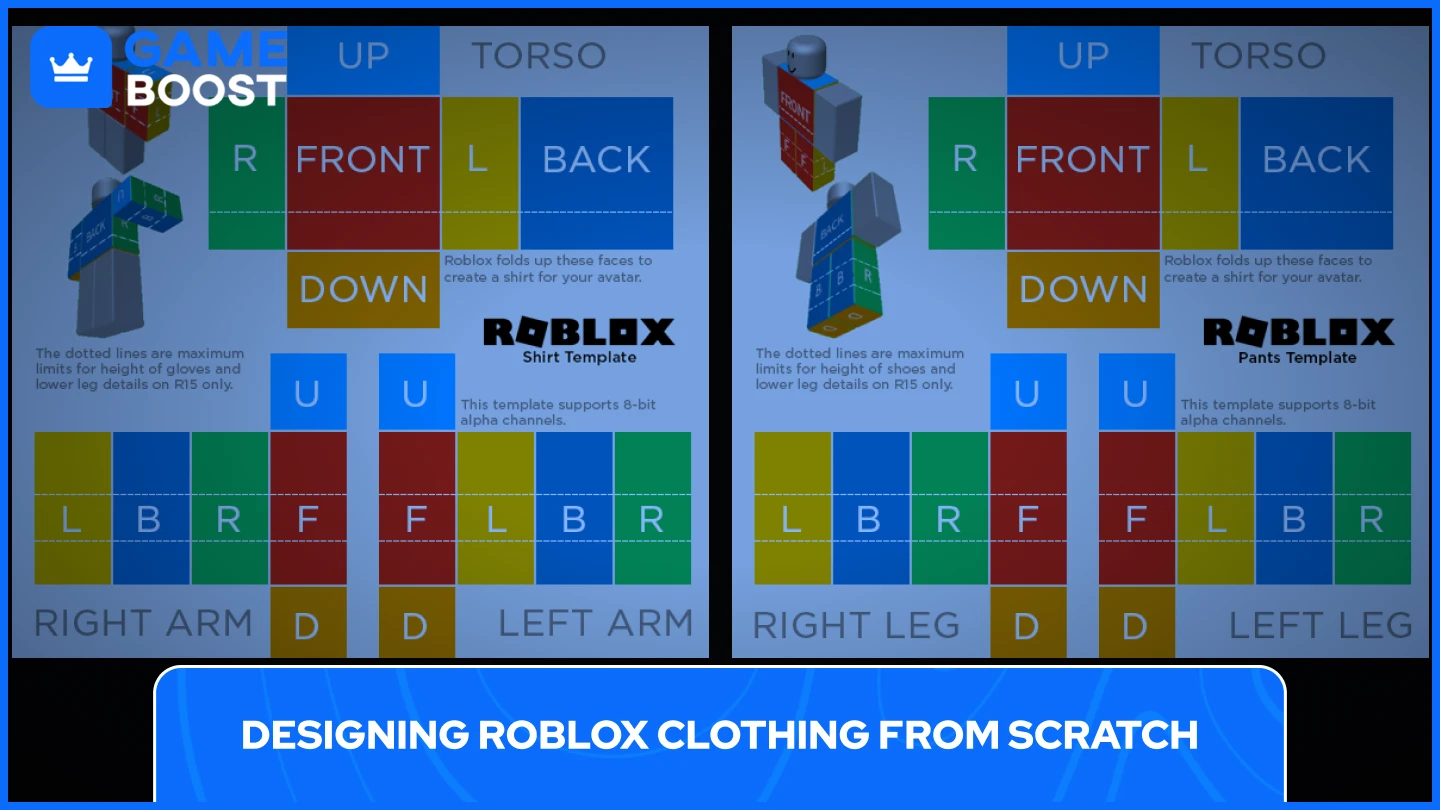
How do advanced templates differ significantly from the basic ones provided to new designers? Advanced templates often provide more specific guides for complex avatar parts and layered clothing, which basic templates might oversimplify. They offer precise areas for intricate details like folds, shadows, and accessories that interact dynamically with the avatar's movement. Exploring **Roblox texture mapping** becomes crucial here, as it dictates how your 2D design wraps onto a 3D model.
Another key difference lies in preparing designs for Roblox’s evolving avatar system, particularly with **Roblox layered clothing**. This advanced feature allows multiple clothing items to be worn simultaneously and interact realistically, creating richer, more dynamic outfits. Mastering advanced templates means you’re ready to design for this exciting future, making your clothing feel more integrated and less like a static texture.
This structured approach ensures that creators can understand not just the 'how-to' but also the 'why' behind using advanced methods. It creates a clear path from fundamental understanding to sophisticated execution in Roblox clothing design, empowering creators at every step of their journey.
Beginner / Core Concepts
1. **Q:** What exactly are advanced Roblox clothing templates, and how do they differ from basic ones I might already know?**A:** Hey there, I get why this confuses so many people when they're starting out! Think of it like this: basic Roblox clothing templates are like a simple coloring book page. You fill in the lines, and you've got a shirt. Advanced templates, however, are like getting a blueprint for a detailed sculpture. They offer much more intricate guidance for things like shading, folds, and how your design wraps around the 3D avatar model. This means you're not just creating a flat texture; you're designing something that interacts with the avatar's shape. It includes specific zones for arms, torso, and legs, often with clearer indications for where seams and shadows should naturally fall. This extra detail allows for a significantly more professional and realistic look, moving beyond simple block colors and patterns. You're building a garment, not just painting a surface, which is a huge leap in quality. You've got this! Try playing around with one of these templates to see the difference firsthand.
2. **Q:** Why should I bother learning advanced templates if I'm already comfortable with basic Roblox clothing design?
**A:** That's a super valid question, and one I used to ask myself too! The main reason, my friend, is to truly stand out in the bustling Roblox marketplace. Basic designs can get you started, but they often blend into the background. Advanced templates empower you to create visually striking, high-quality garments that players are genuinely excited to wear and buy. It's about elevating your craft. By understanding things like proper UV mapping and how to bake ambient occlusion, your clothing will have depth, realistic shadows, and a tailored fit that basic templates simply can't achieve. This leads to higher engagement, better sales if you're a creator, and a stronger personal brand within the community. Plus, it's just plain fun to see your visions come to life with such precision! Don't be afraid to push your limits; the payoff is huge.
3. **Q:** What software or tools do I absolutely need to start working with advanced Roblox clothing templates effectively?
**A:** Okay, so if you're looking to get serious, you'll want to move beyond basic paint programs. The absolute essentials are a good image editing software and the Roblox Studio. For image editing, most pros swear by **Adobe Photoshop** or **Affinity Photo** for paid options, due to their robust layer management, advanced brushes, and precision tools. If you're on a budget, **GIMP** and **Krita** are fantastic free alternatives that offer a surprising amount of power. You'll use these to meticulously paint your textures onto the template. Roblox Studio is crucial for uploading, previewing, and testing how your designs look directly on avatars in a 3D environment. Beyond that, some creators also dabble in 3D modeling software like **Blender** for more complex layered clothing or accessories, but that's a step further down the road. Start with a solid image editor and Studio, and you'll be golden! Give it a whirl this week.
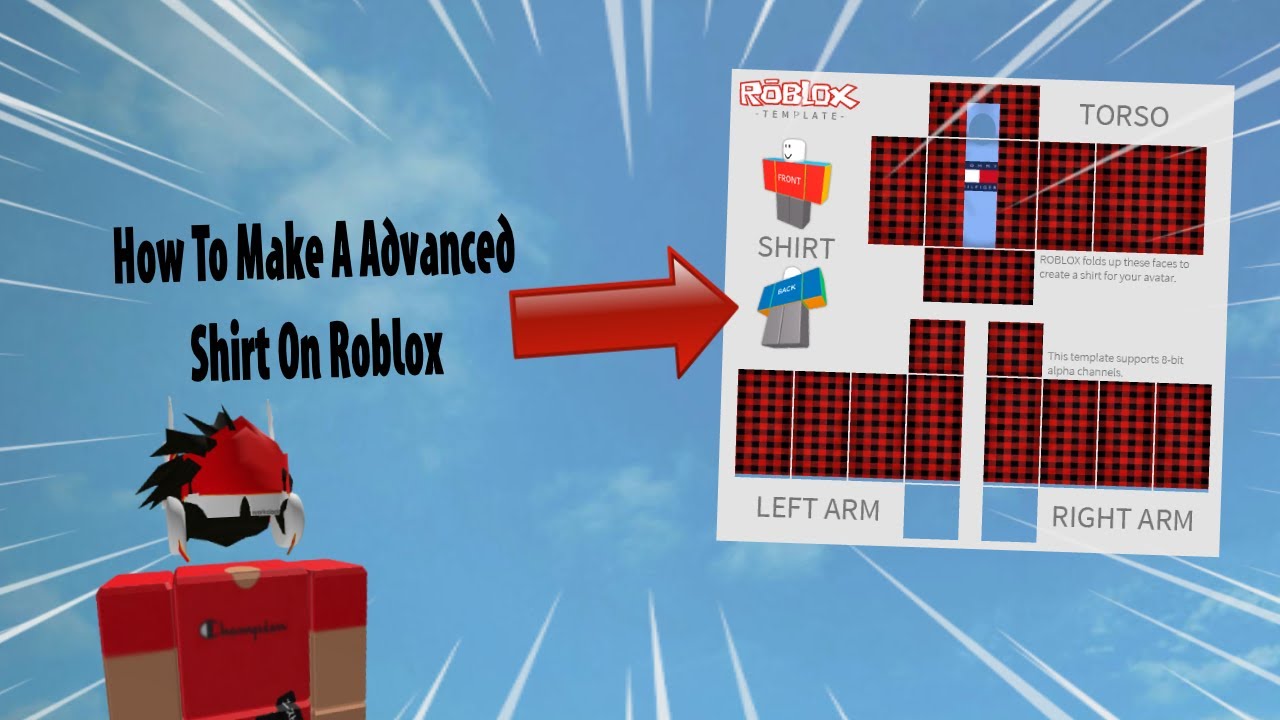
4. **Q:** How do I properly upload and test my advanced clothing designs in Roblox Studio to ensure they look good?
**A:** This one used to trip me up too, especially getting the alignment just right! First, once your design is complete in your image editor, you'll export it as a PNG file. Make sure it's 585x559 pixels for shirts/pants, and the background is transparent where you want the avatar's skin to show through. Next, open Roblox Studio, go to the 'Develop' page on the Roblox website, and navigate to 'Creations' > 'Shirts' or 'Pants'. Click 'Choose File' and select your PNG. Give it a name, a description, and then click 'Upload'. After uploading, you can then try it on in Studio! Create a new place, insert your avatar (go to 'Plugins' > 'Build Rig' if you don't have one), and then apply your newly uploaded clothing item by clicking on the avatar and finding the 'ShirtTemplate' or 'PantsTemplate' property in the 'Properties' window. Paste your Asset ID there. This lets you inspect it from all angles, check for stretching, and see how it moves. It's a critical step for refining your work. You've got this, don't rush the testing phase!
Intermediate / Practical & Production
5. **Q:** What's the deal with UV mapping and why is it so important for advanced Roblox clothing templates?**A:** Ah, UV mapping! This is where things start to feel a bit more like magic, right? Essentially, UV mapping is the process of flattening out a 3D model's surface onto a 2D plane so you can paint a texture onto it. Imagine trying to wrap a present with complicated folds; you need to know exactly where each part of the wrapping paper goes. For advanced Roblox clothing, the template itself is a 2D representation of the avatar's 3D body. Proper UV mapping ensures your texture—your design—sits perfectly without distortion, stretching, or weird seams. If your UVs are off, your designs will look warped or misaligned on the avatar. Understanding where each pixel on your 2D template corresponds to a specific point on the 3D avatar is critical for placing details like pockets, logos, or intricate patterns precisely. It's the bridge between your flat artwork and the avatar's dynamic form. Keep practicing, and it'll click!
6. **Q:** How can I create realistic shadows and folds in my clothing designs using advanced templates for a more professional look?
**A:** This is one of the biggest leaps from basic to advanced, and it makes a huge difference! The key is understanding light and shadow, even if you're not an expert artist. Start by identifying where natural light sources would hit the avatar and where shadows would logically fall, like under the arms, beneath collars, or where fabric bunches. Use softer brushes with lower opacity in your image editor to gently paint in these shadow areas. Don't go too dark too fast; build up the layers. For folds, think about how fabric drapes and wrinkles – often in
key_hightlights about advanced roblox clothing template
35


Advanced Shirt Template Community Resources Developer Forum Roblox . Roblox Shirt Template Your Guide To Custom Apparel Design A Roblox T Shirt Design Template Shown In The Image . Free Roblox Shirt Templates To Edit Online Awesome Roblox Template Edit Online . Free Roblox Shirt Templates To Edit Online Hoodie Roblox Shirt Template Edit Online . Free Roblox Shirt Y2k Design Template To Edit Online Transparent Roblox Shirt Template Edit Online


The Ultimate Roblox Clothing Template By Billynickn On DeviantArt The Ultimate Roblox Clothing Template By Billynickn Dezr3xy Fullview . How To Make A Advanced Shirt On Roblox 2026 YouTube . How Do I Make Clothes On Roblox In 2026 5. Customizing The Template With A Graphic Design. How To Design Clothing Community Tutorials Developer Forum Roblox . Free Roblox Shirt Templates To Edit Online Red Pattern Roblox Shirt Template Edit Online


Free Roblox Shirt Templates Fanny Printable How To Make Roblox. How To Make Roblox Clothing A Step By Step Guide 63345cdc B656 44b2 85bb. Roblox Shirt Template Your Guide To Custom Apparel Design Two Different Roblox Design Templates Shown In The Image 1024x683 . Free Roblox Shirt Templates To Edit Online Creative Roblox Shirt Game Template Edit Online . Best Roblox Clothing Templates Gamepur Templatye1 800x450


Make Stylish Roblox Clothes With These 50 Reusable Outfits Roblox Clothing Design Templates Shirt Download 416x212 . Discover Roblox Clothing Templates To Preview And Edit Image. Free Roblox Classic Shirt Template To Edit Online Roblox Classic Shirt Template Edit Online . Free Roblox Shirt Templates To Edit Online Roblox Green Shirt Template Edit Online . Free Roblox Shirt Templates To Edit Online Simple Camouflage Roblox Shirt Template Edit Online


Roblox Clothing Templates Png . Free Roblox Shirt Templates To Edit Online Roblox Shirt Y2k Design Template Edit Online . Free Roblox Shirt Templates To Edit Online Nike Roblox Shirt Template Edit Online . Roblox Clothes Template Transparent Best Templates Resources . Roblox Advanced Template Templates Hexagon


Advanced Cutecore Roblox Classic Clothing Template Clothing . How To Use The Advanced Template Tutorial Making Roblox Clothes . Clothing Design Beginner Part 2 Templates Community Roblox Advanced 4284460 Middle . Advanced Roblox Shirt Template H Ng D N Thi T K O Roblox Chi Ti T . Clothing Design Beginner Part 2 Templates Community Tutorials


Make Stylish Roblox Clothes With These 50 Reusable Outfits Roblox Striped T Shirt Tie Striped Suit Funny Suit Roblox Clothing Template . Roblox Shirt Templates Design Your Dream Outfit . Best Roblox Clothing Templates Gamepur Roblox3 . Free Blank Roblox Shirt For Teens Template To Edit Online Cartoon Roblox Shirt Design Template Edit Online . Designing Your Roblox Avatar Where To Find Outfit Templates In 2026 Pink Roblox Shirt Template Edit Online